In mid February 2009, shortly after installing Windows 7 Beta on my primary PC, I made the huge mistake of running an automated ‘Registry Cleaner’ program. Suffice it to say, it destroyed my system.
Because, my data is backed up on a nightly basis, I lost no data. But I did lose years (stretching back to my first Vista x64 install in January of 2007) of application installations and tweaks. Two months later I have finally (mostly) completed the long and laborious chore of re-installing and tweaking the many dozens of applications I use every day.
To ensure that I NEVER experience this special kind of hell again I decided to create an image of my primary system C:\ drive. I looked at various commercial system image/ghosting programs but decided that the system image feature built into Windows 7 was sufficient for my needs.
Highlights:
- The process took about 30 minutes for a 100 Gig C:\ drive.
- I was able to use Windows 7 and all my apps as normal during the entire time the image was being created.
- Compression was terrific. It compressed my 100 GB system to a 45 GB image backup.
Below is a simple step-by-step description of how to use it. The process is simple:
- Click on the Start button.
- Type ‘Backup’ into the search box.
- Choose the ‘Backup and Restore’ Center option.
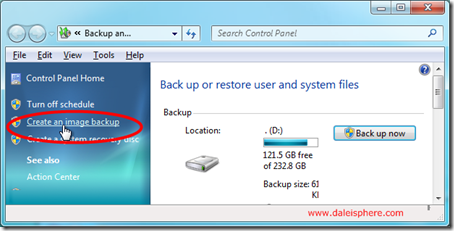
- This will take you to the ‘Control Panel –> System and Security –> Backup and Restore’ page (see image above).
- Select the ‘Create an image backup’ option (circled in red above).
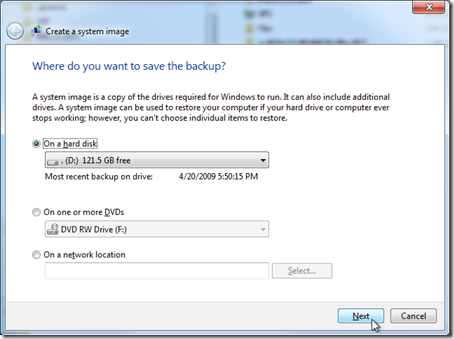
- Choose where you want to save the image. You can choose between another drive on the same machine, a network drive or you can burn it to a bunch of DVDs. In my case I chose a largely empty local D:\ drive.
Glitch Re: Network Drive Credentials: There is a glaring glitch if you want to backup the image to network location. For example, when upgrading my laptop to Windows 7 RC 1, I wanted to save a laptop image to my Drobo which is hung off of a networked XP machine. However, I do not require password credentials to access my shared network drives. Windows 7 would not allow me to proceed with the image backup when the network credential fields are left blank. Grrr!
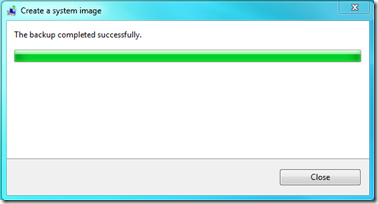
- Click ‘Next’ and away it goes:
- It took about 30 minutes to create the image of the 100 GB system C:\ drive on the locally attached D:\ drive.
- The ultimate image is substantially compressed. The image on the D:/ drive was 47.5 GB – 47.5% of the original 100 GB size!
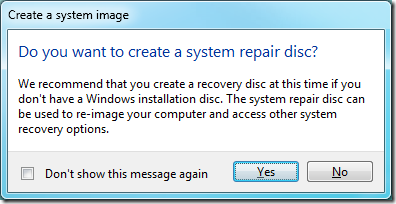
- When done, you are given the option to create a bootable repair disk:
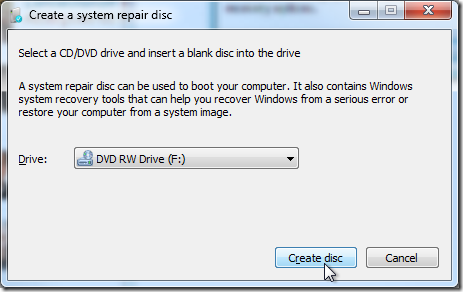
- As the message above implies, if you have the original Windows 7 install disk, you won’t need a separate recovery disk because the install disk provides an option to recover from such system images. That said, for the cost of a blank DVD, I chose ‘Yes’ here.
- You next choose what DVD RW Drive to burn the recovery disk to – in my case the F:\ drive.
- It took about 1 minute to burn the recovery disk.
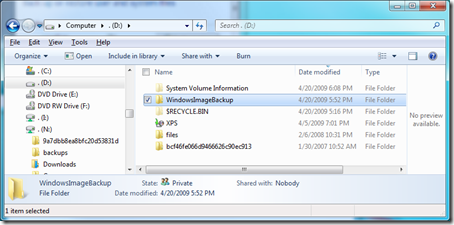
- On the local or network drive, the saved image is stored in a directory entitled ‘WindowsImageBackup’ (highlighted in the image below):
That’s it.
Now, I haven’t tested the image backup to confirm that recovery works as advertised. I trust that it will. I hope I never have to find out.
—
For a look at Windows 7’s built-in data backup system, see: ‘First Look at Windows 7’s Backup and Restore Center’.
Note: I don’t use the built-in data backup system. I much prefer Centered System’s Second Copy,

Comments are closed.